


Table of contents
Prerequisites
Install OBS.
Install the virtual cable and audio monitor plugin if you don't have them already.
Download the OBS Scene Collection for the Satsang (
.jsonfile).Download all the Satsang materials.
Zoom Setup
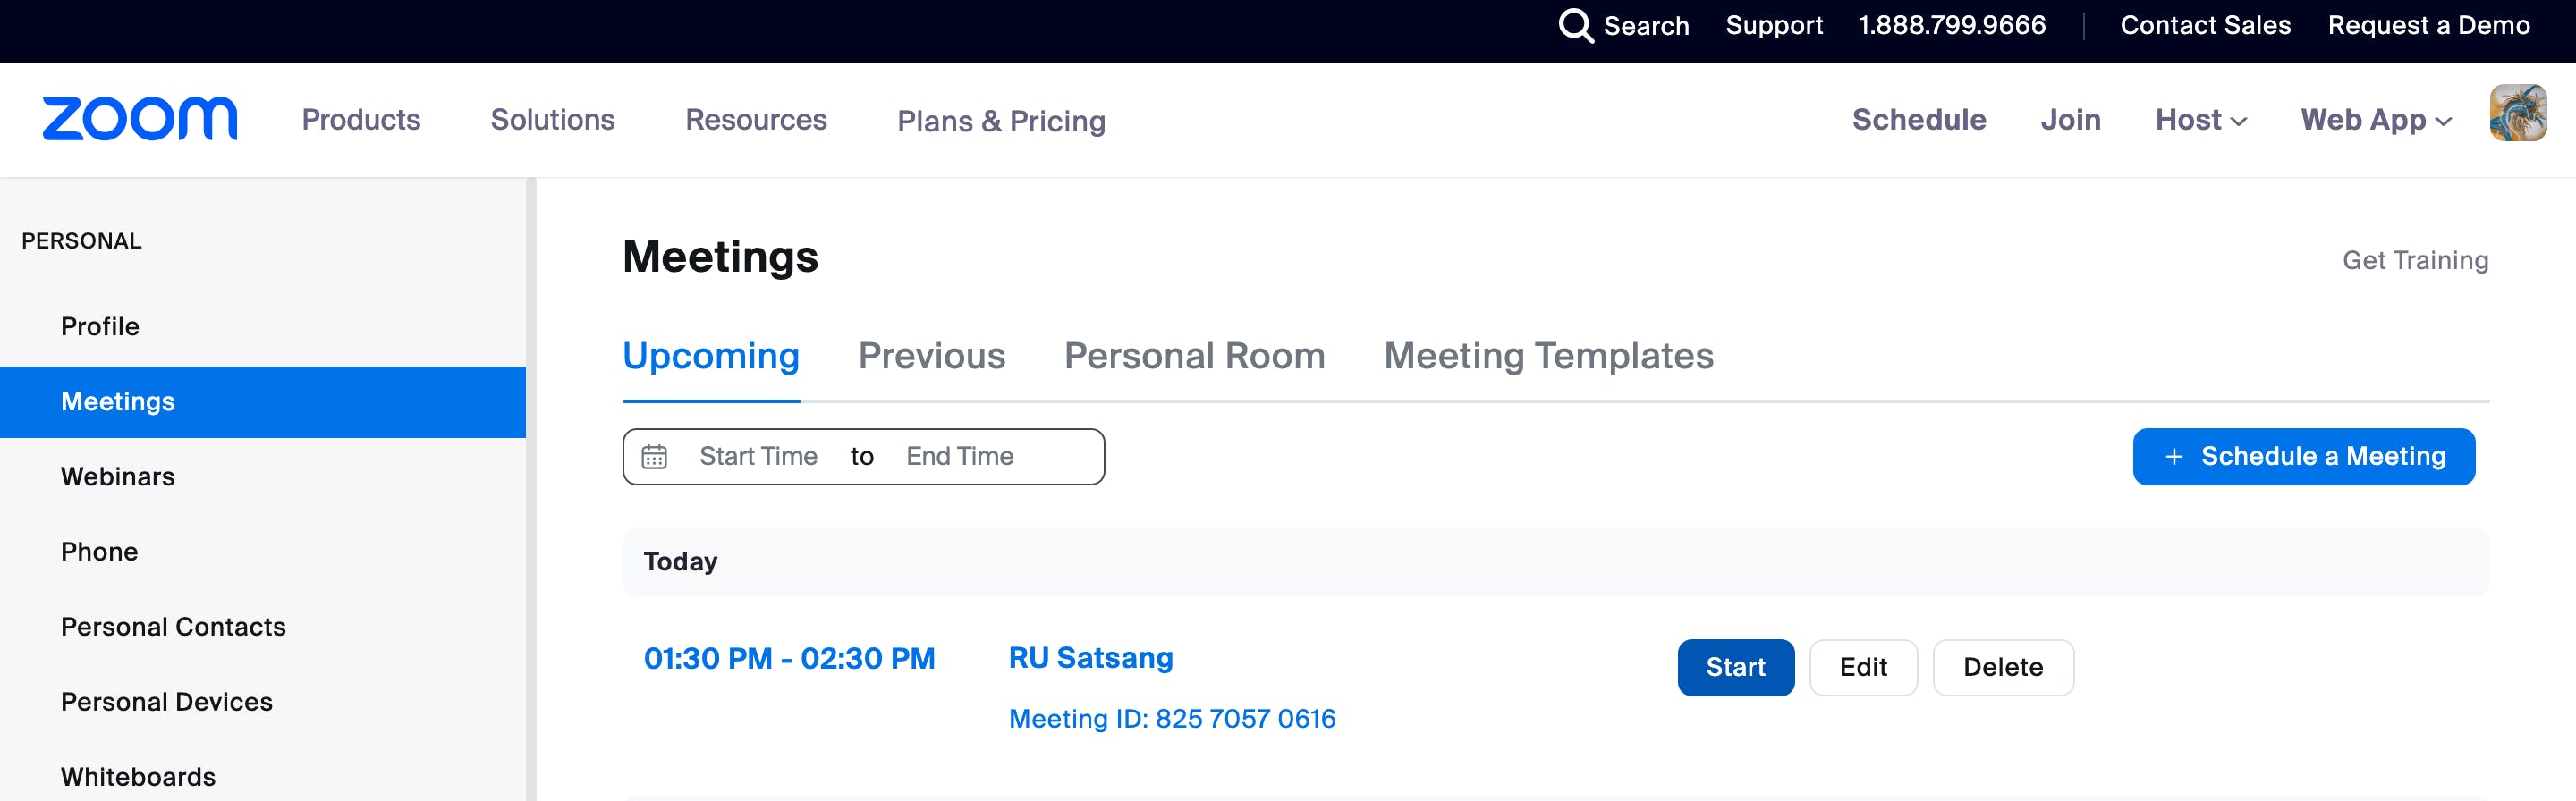
1 - Log in to the Zoom Web
First, you need to log into the correct Zoom account and start the meeting.
Important: Don't log in to the Zoom Desktop App, we had some issues with OTP codes using the method before. Instead, log in to Chrome browser using this link. This way Zoom will remember your device for a few days (month): https://zoom.us/signin
Important: If you log in for the first time Zoom will ask you to confirm that it is you using a mobile or something like this. You need to select "other methods" and choose one which says OTP code. Zoom will send the code to the email, so you need to ensure that someone who has access to this email is available.
After you log in go to the "Meetings" section, choose the correct one and click "Start". It'll open the meeting in Zoom Desktop automatically.
2 - Zoom Audio Settings
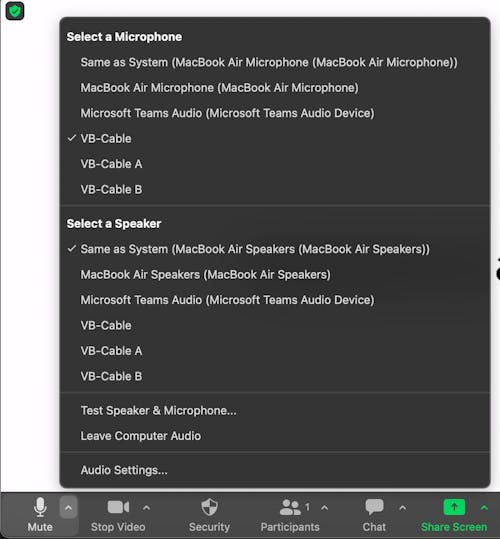
Check your Zoom Audio settings. Select Virtual Cable as a microphone. For the speaker, we can select anything except Virtual Cable because everyone else will be muted anyway.
Note: Don't select Virtual Cable as a Speaker since it may create issues.
Now we will fix the Auto Noise suppression issue. For this click "Audio Settings".

Select "Original sound for musicians". Check "High-fidelity mode", "Stereo audio" and uncheck "Echo cancellation".

And don't forget to enable this profile by clicking on this text in the left top corner. By default, Zoom will use noise suppression and it will break our music.

3 - Zoom Video Settings
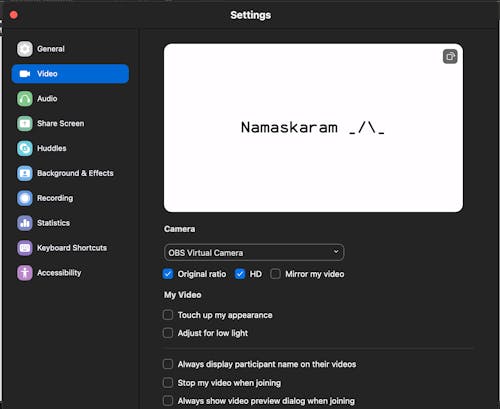
Check your Video settings. You should select "OBS Virtual Camera" and check "Original ratio" and "HD" and uncheck "Mirror my video".
4 - Zoom Chat Settings
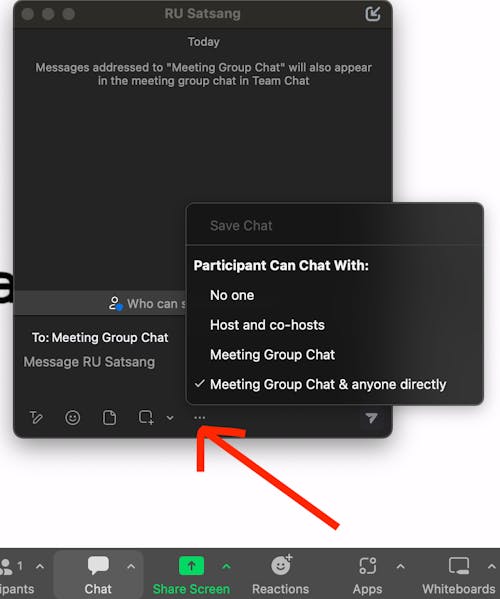
Check Chat settings. Chat should be:
disabled ("Host and co-hosts" option) during practices like invocation, SMK and meditation
enabled ("Meeting Group Chat" option) during Yoga Padi, Sharings, Q&A, etc
5 - Zoom Participants Settings
Check the Participants' settings. They should not be allowed to unmute themselves but we can allow them to rename and start the camera.
Very important: don't forget to check the "Mute All Upon Entry" option. If it's not checked some participants will have their mic on and will disturb the session.
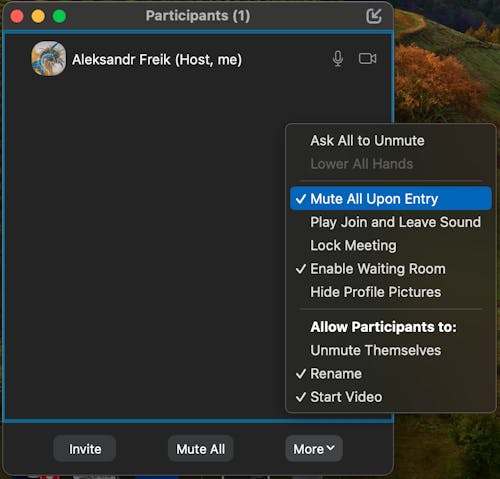
Note: Be careful when using the "Mute All" button. It will actually mute all other people except yourself. So if you are a co-host it will mute the host...
OBS Set Up Steps
Now open the OBS application.
1 - Setting Up Scene Collection
Import the Satsang Scene Collection. You can skip this if you already have the Scene Collection ready.
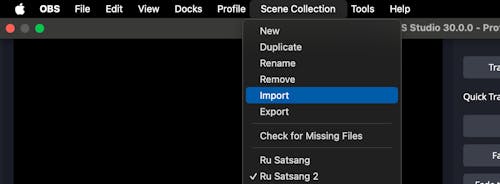
- Go to "Scene Collection" > "Import".
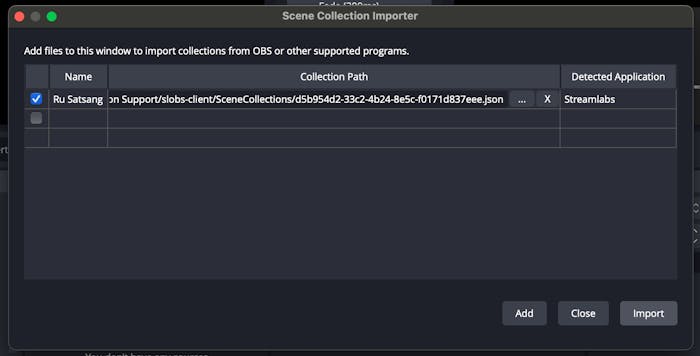
- After this click "Add" and open the
.jsonfile with the collection. After this select it and click "Import".
Note: after clicking import OBS won't change the current scene automatically. You will need to go to the "Scene Collection" again and select the newly added scene.
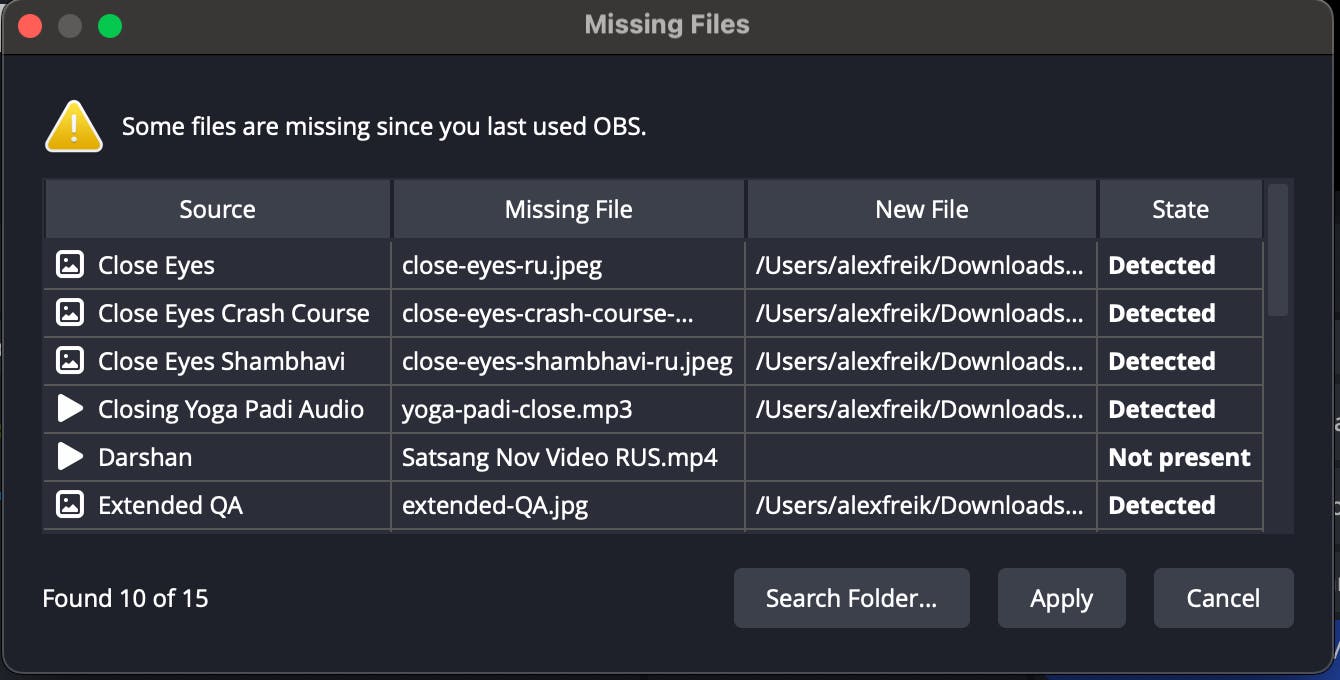
It might say that some files are missing. You can click "Search Folder" and select folders with your common files like Guided SMK, Yoga Padi, Close Eyes Slide, etc and click Apply. Some files will become "Detected".
Note: You can search & open several folders, not just one.
But some files like Darshan may still be "Not present", you can ignore them. We will relink them later manually.
2 - Updating Scene Collection
The common files are the same, but we need to update files that change every month:
Short Sadhguru Audio Byte
Meditation audio
Darshan video
Announcement slides
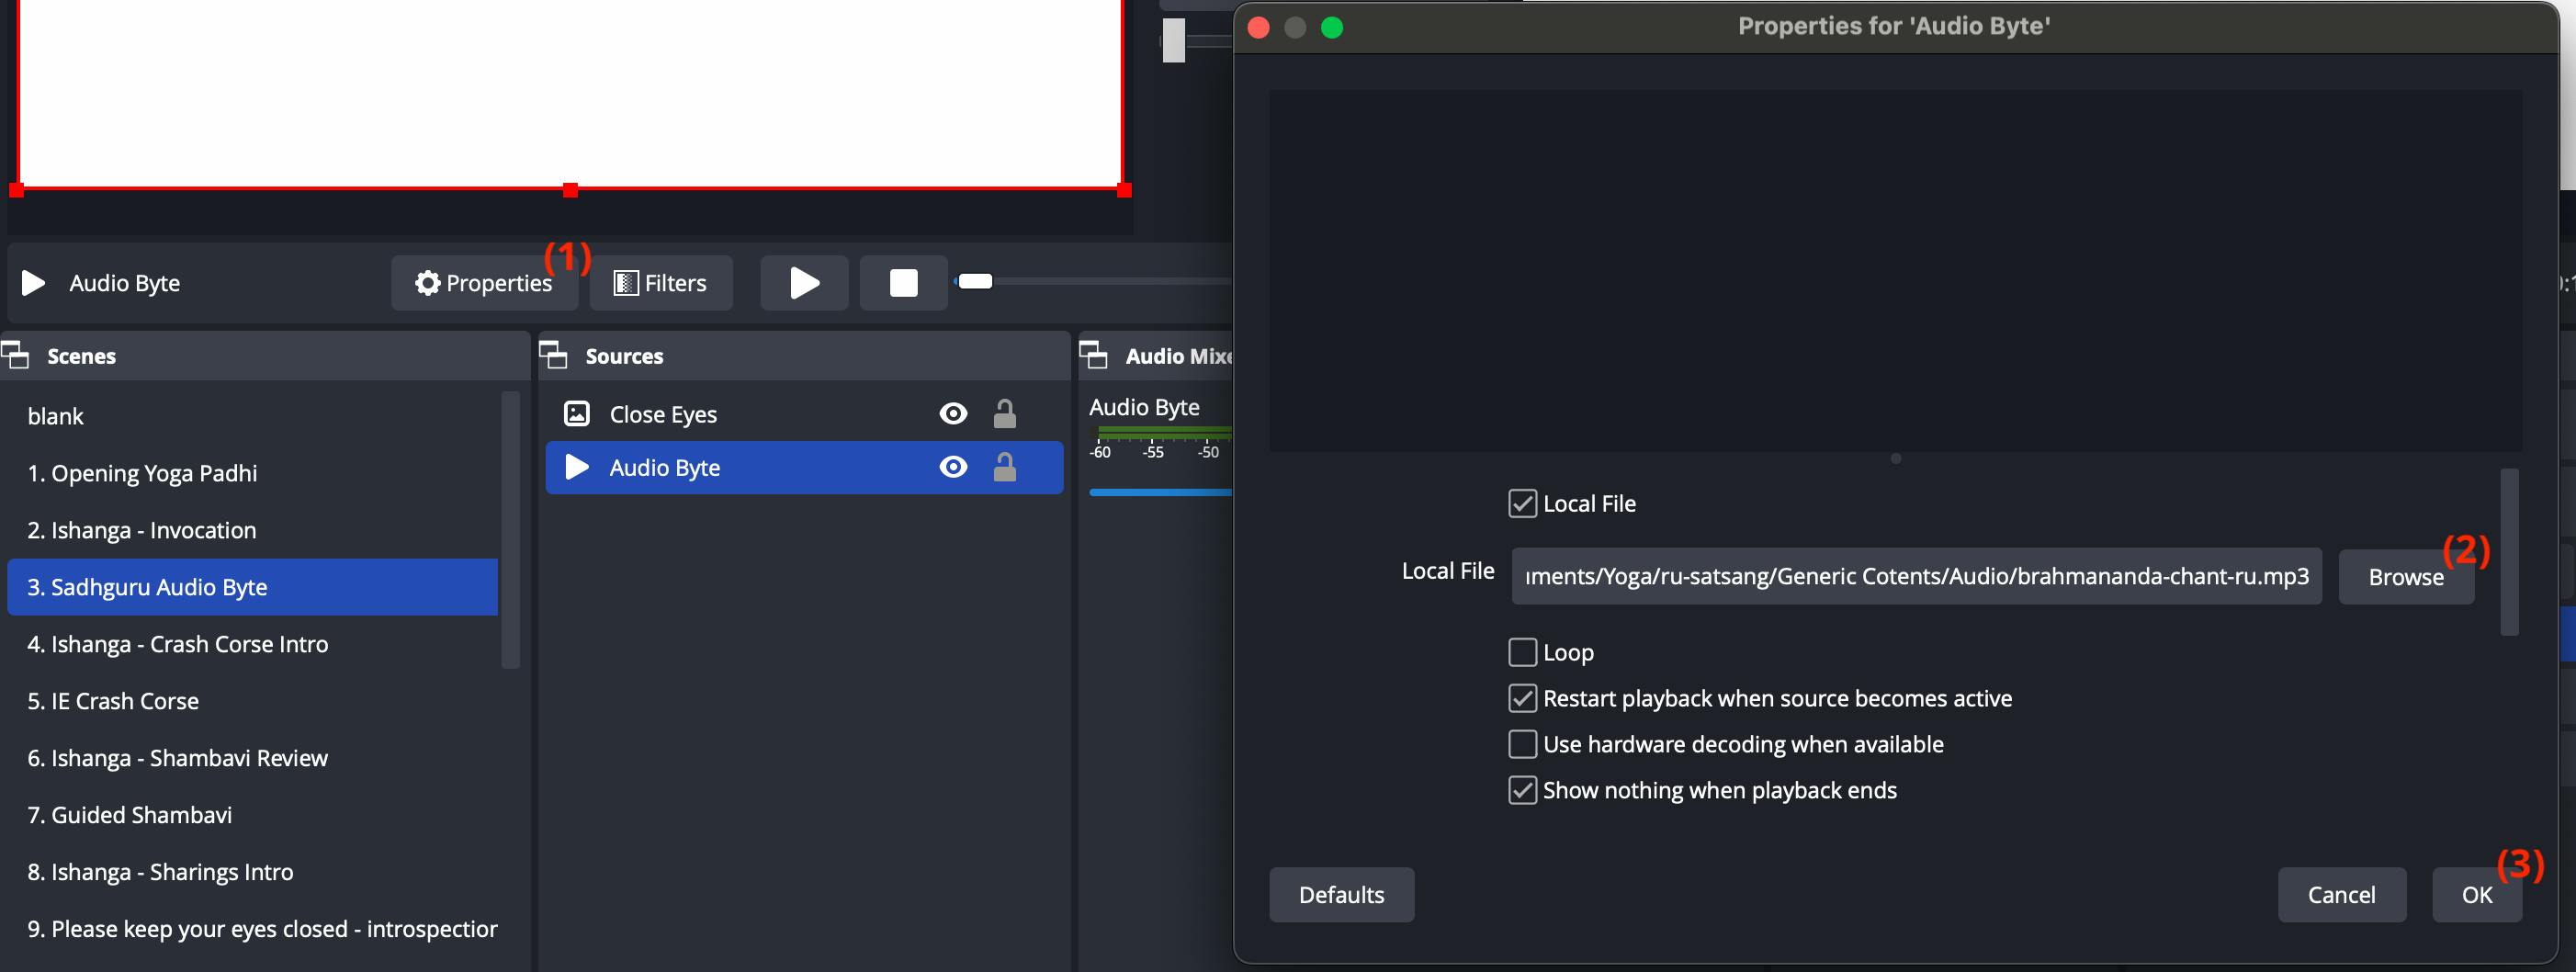
To do this select the scene and choose the source you want to fix. See the photo below:
Click on the "Properties" button. It will open the settings window like below.
Click the "Browse" button and select the correct file.
Click "OK" to update the source.
3 - Announcement Slides
First, you will need to download all the announcement slides as .png images and put them in one folder. To do this you can open the Google Slides and download each slide manually:
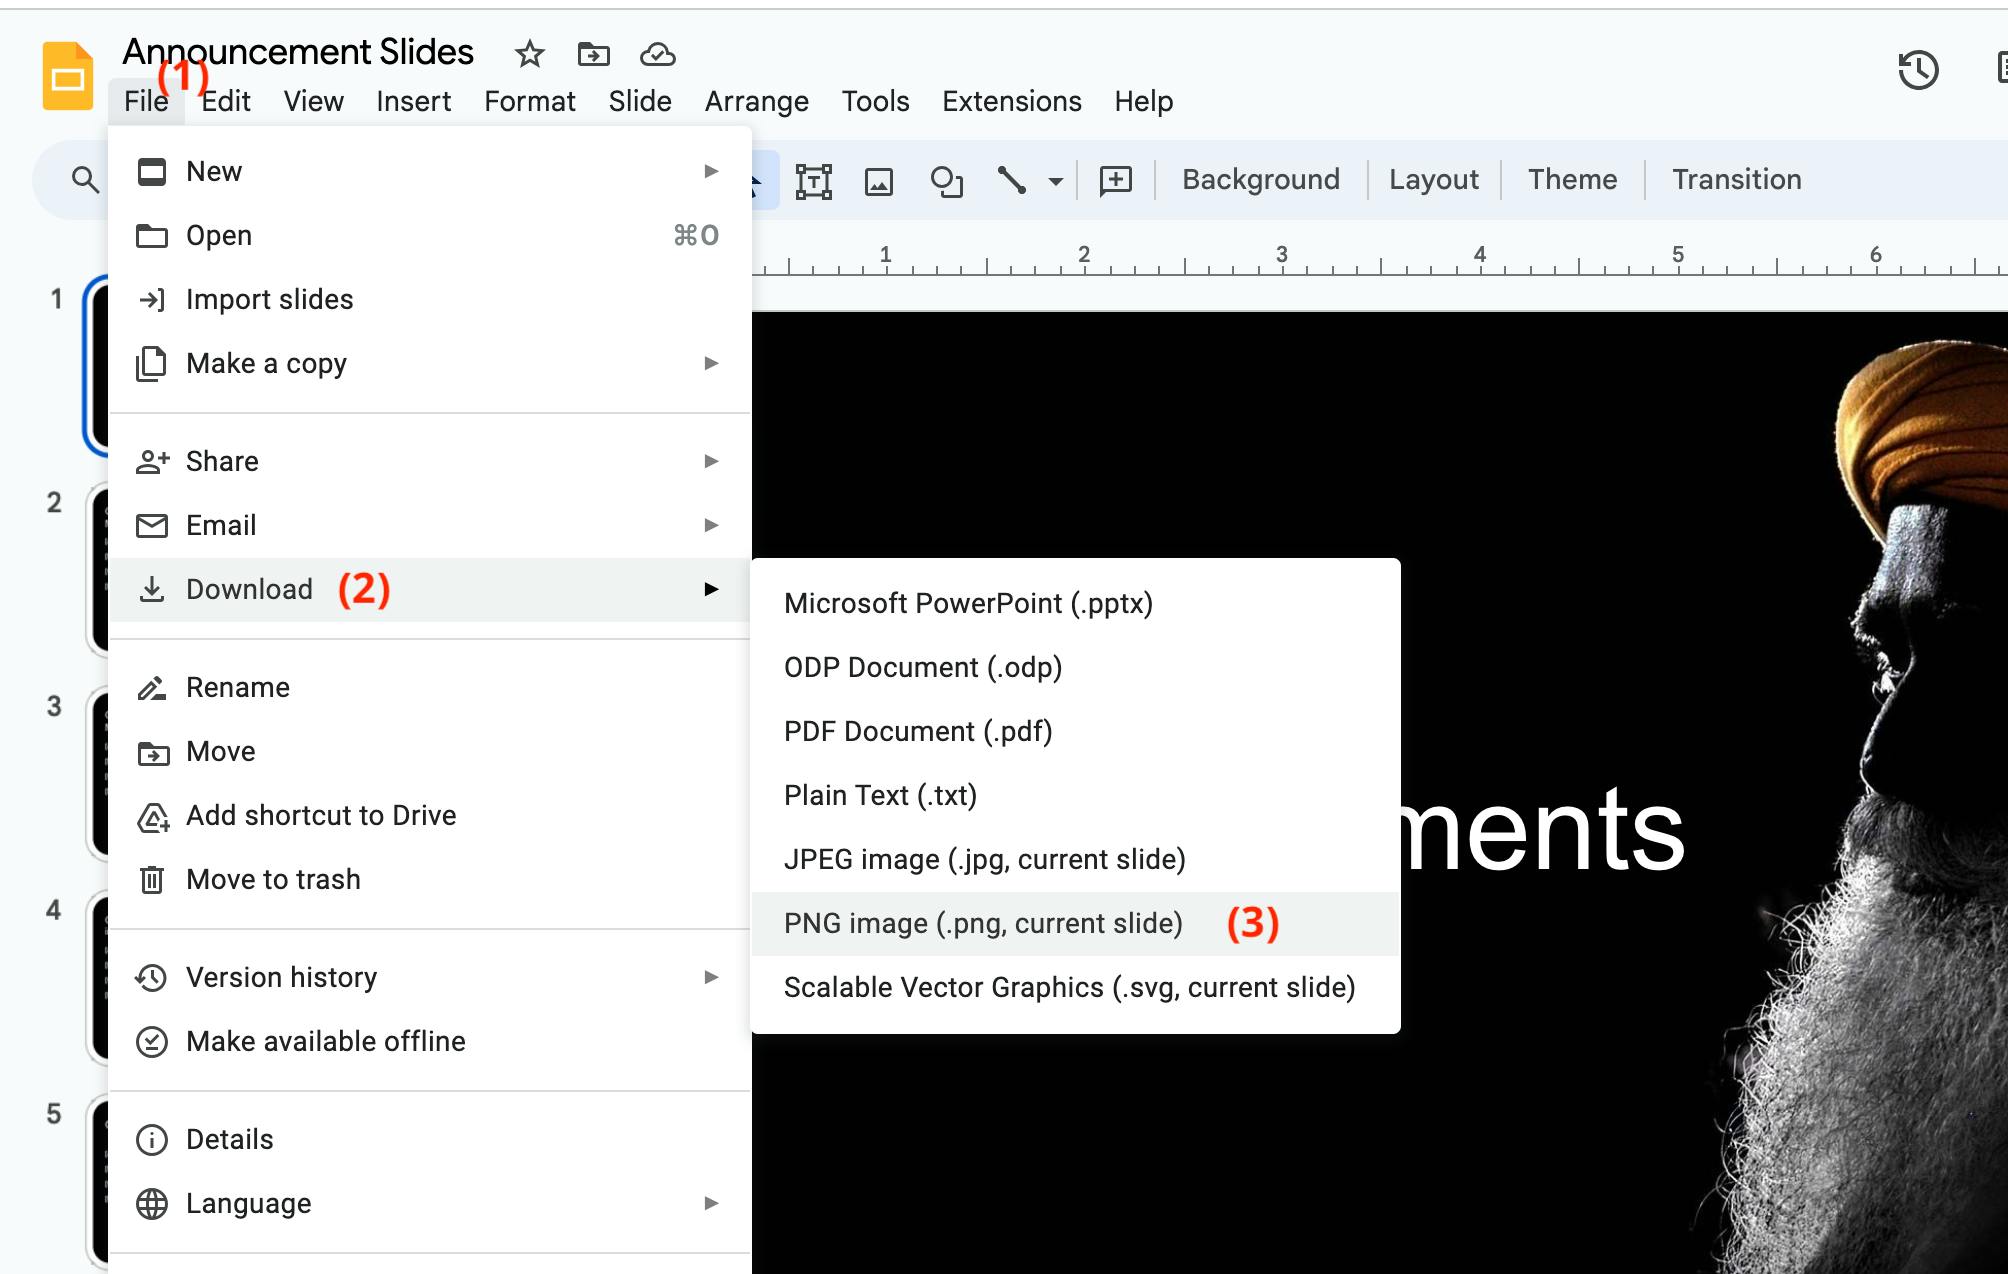
Tip 1: Download slides as
.pnginstead of.jpgfor better quality.Tip 2: If there are lots of slides you can download them as
.pngimages: https://pdf2png.com/
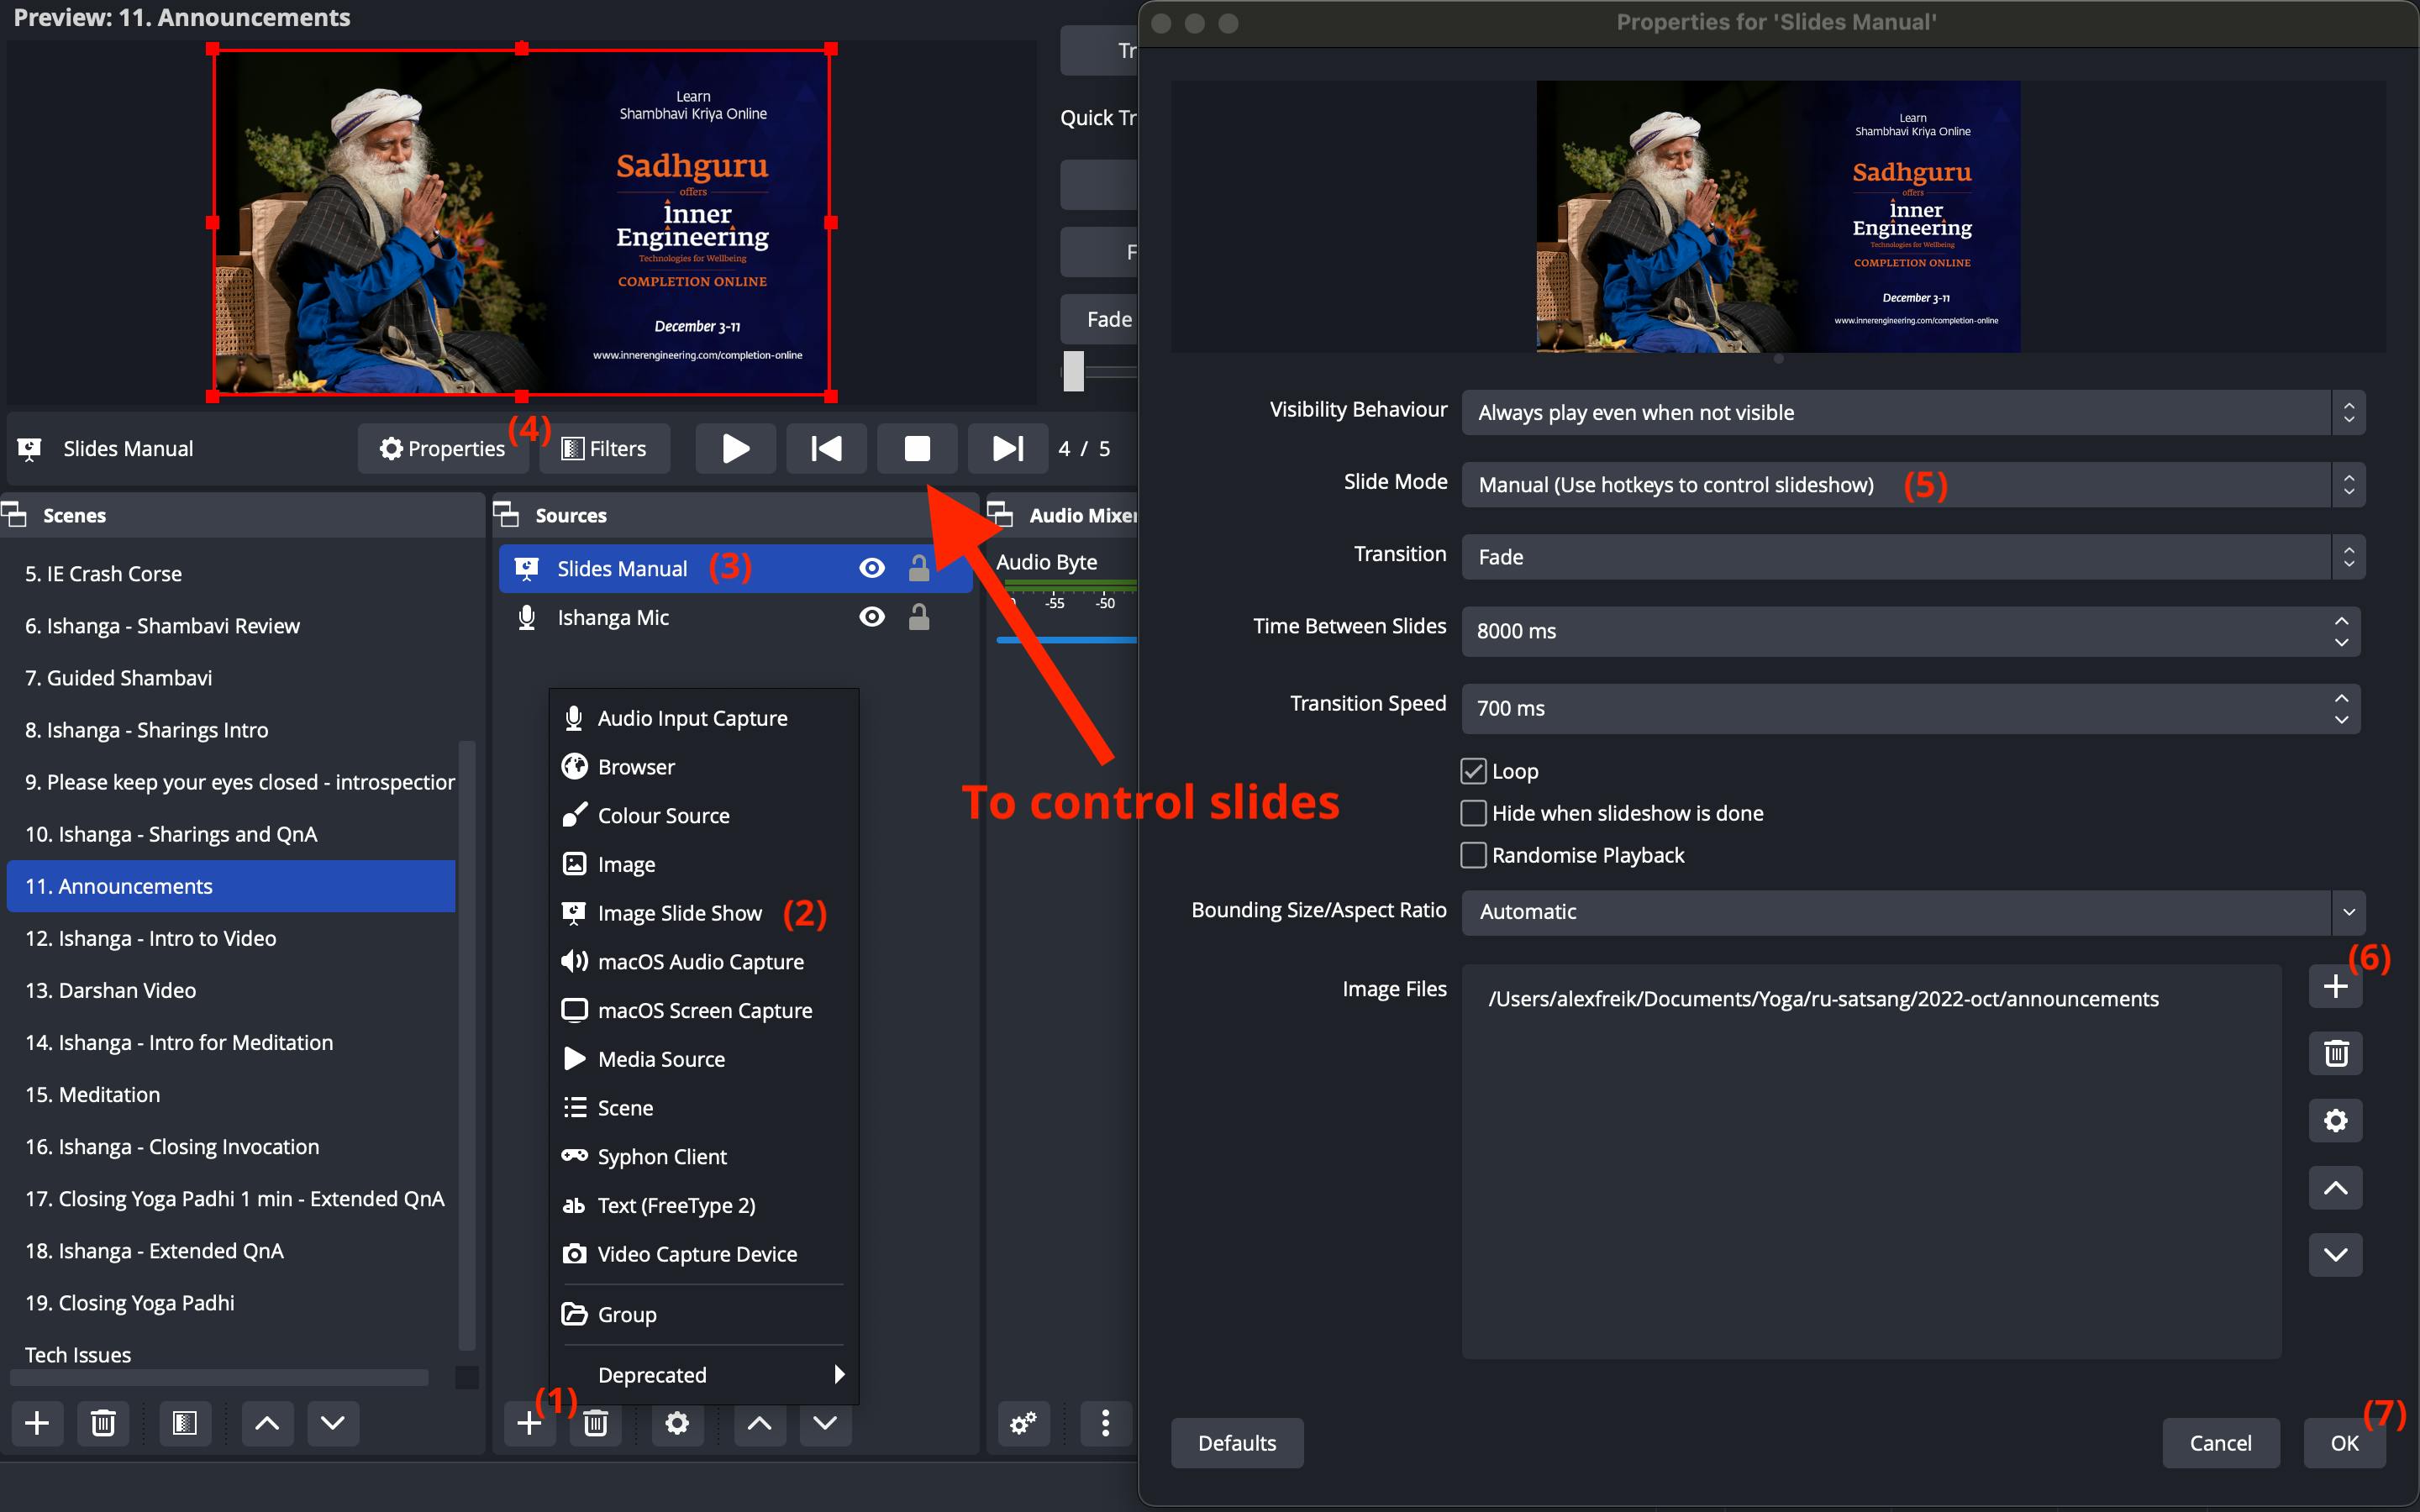
Now you can create a new slideshow (or update the current one). See the photo below:
If Slide Show source already exists you can skip steps 1-3, you don't need to create a new one.
Click "+" in the "Sources" section.
Choose "Image Slide Show".
Select it.
Open it's "Properties".
Select Mode. For the slide show during the session select "Manual", so you can control them yourself. And for the slides during Yoga Padi select "Automatic" so they are playing automatically.
Click "+" icon. You can select "Add Files" and add images one by one or you can choose "Add Directory" to add all images inside the Directory.
Click "OK".
You can control slides using arrows as shown in the picture below.
4 - Send Video to Virtual Camera (for Zoom)
Start the OBS virtual camera so we can use it in Zoom. Whatever is being displayed on OBS' right screen will appear in Virtual Camera.
5 - Send Audio to Virtual Cable (for Zoom)
Virtual Cable Explanation: You can imagine this cable as a pipe. The pipe has an input hole and an output hole. In the case of a normal microphone when you are speaking the mic is putting pieces of your speech audio into the "input hole" of the mic's wire (that connects the mic and the laptop). If you select this particular mic in Zoom, then Zoom will take those audio pieces from the "output hole" and other participants will hear you.
Now instead of an actual wire, we are using a virtual one. We already selected it as a mic in Zoom so it will be taking audio pieces from the "output hole" of our virtual cable. Now we need to configure OBS, such that when audio is playing it will put pieces of this audio into the "input hole" of the virtual cable.
To achieve this we will use the Monitoring feature of OBS. It allows us to select a monitoring device and whatever is being played in OBS it will send this audio to this device.
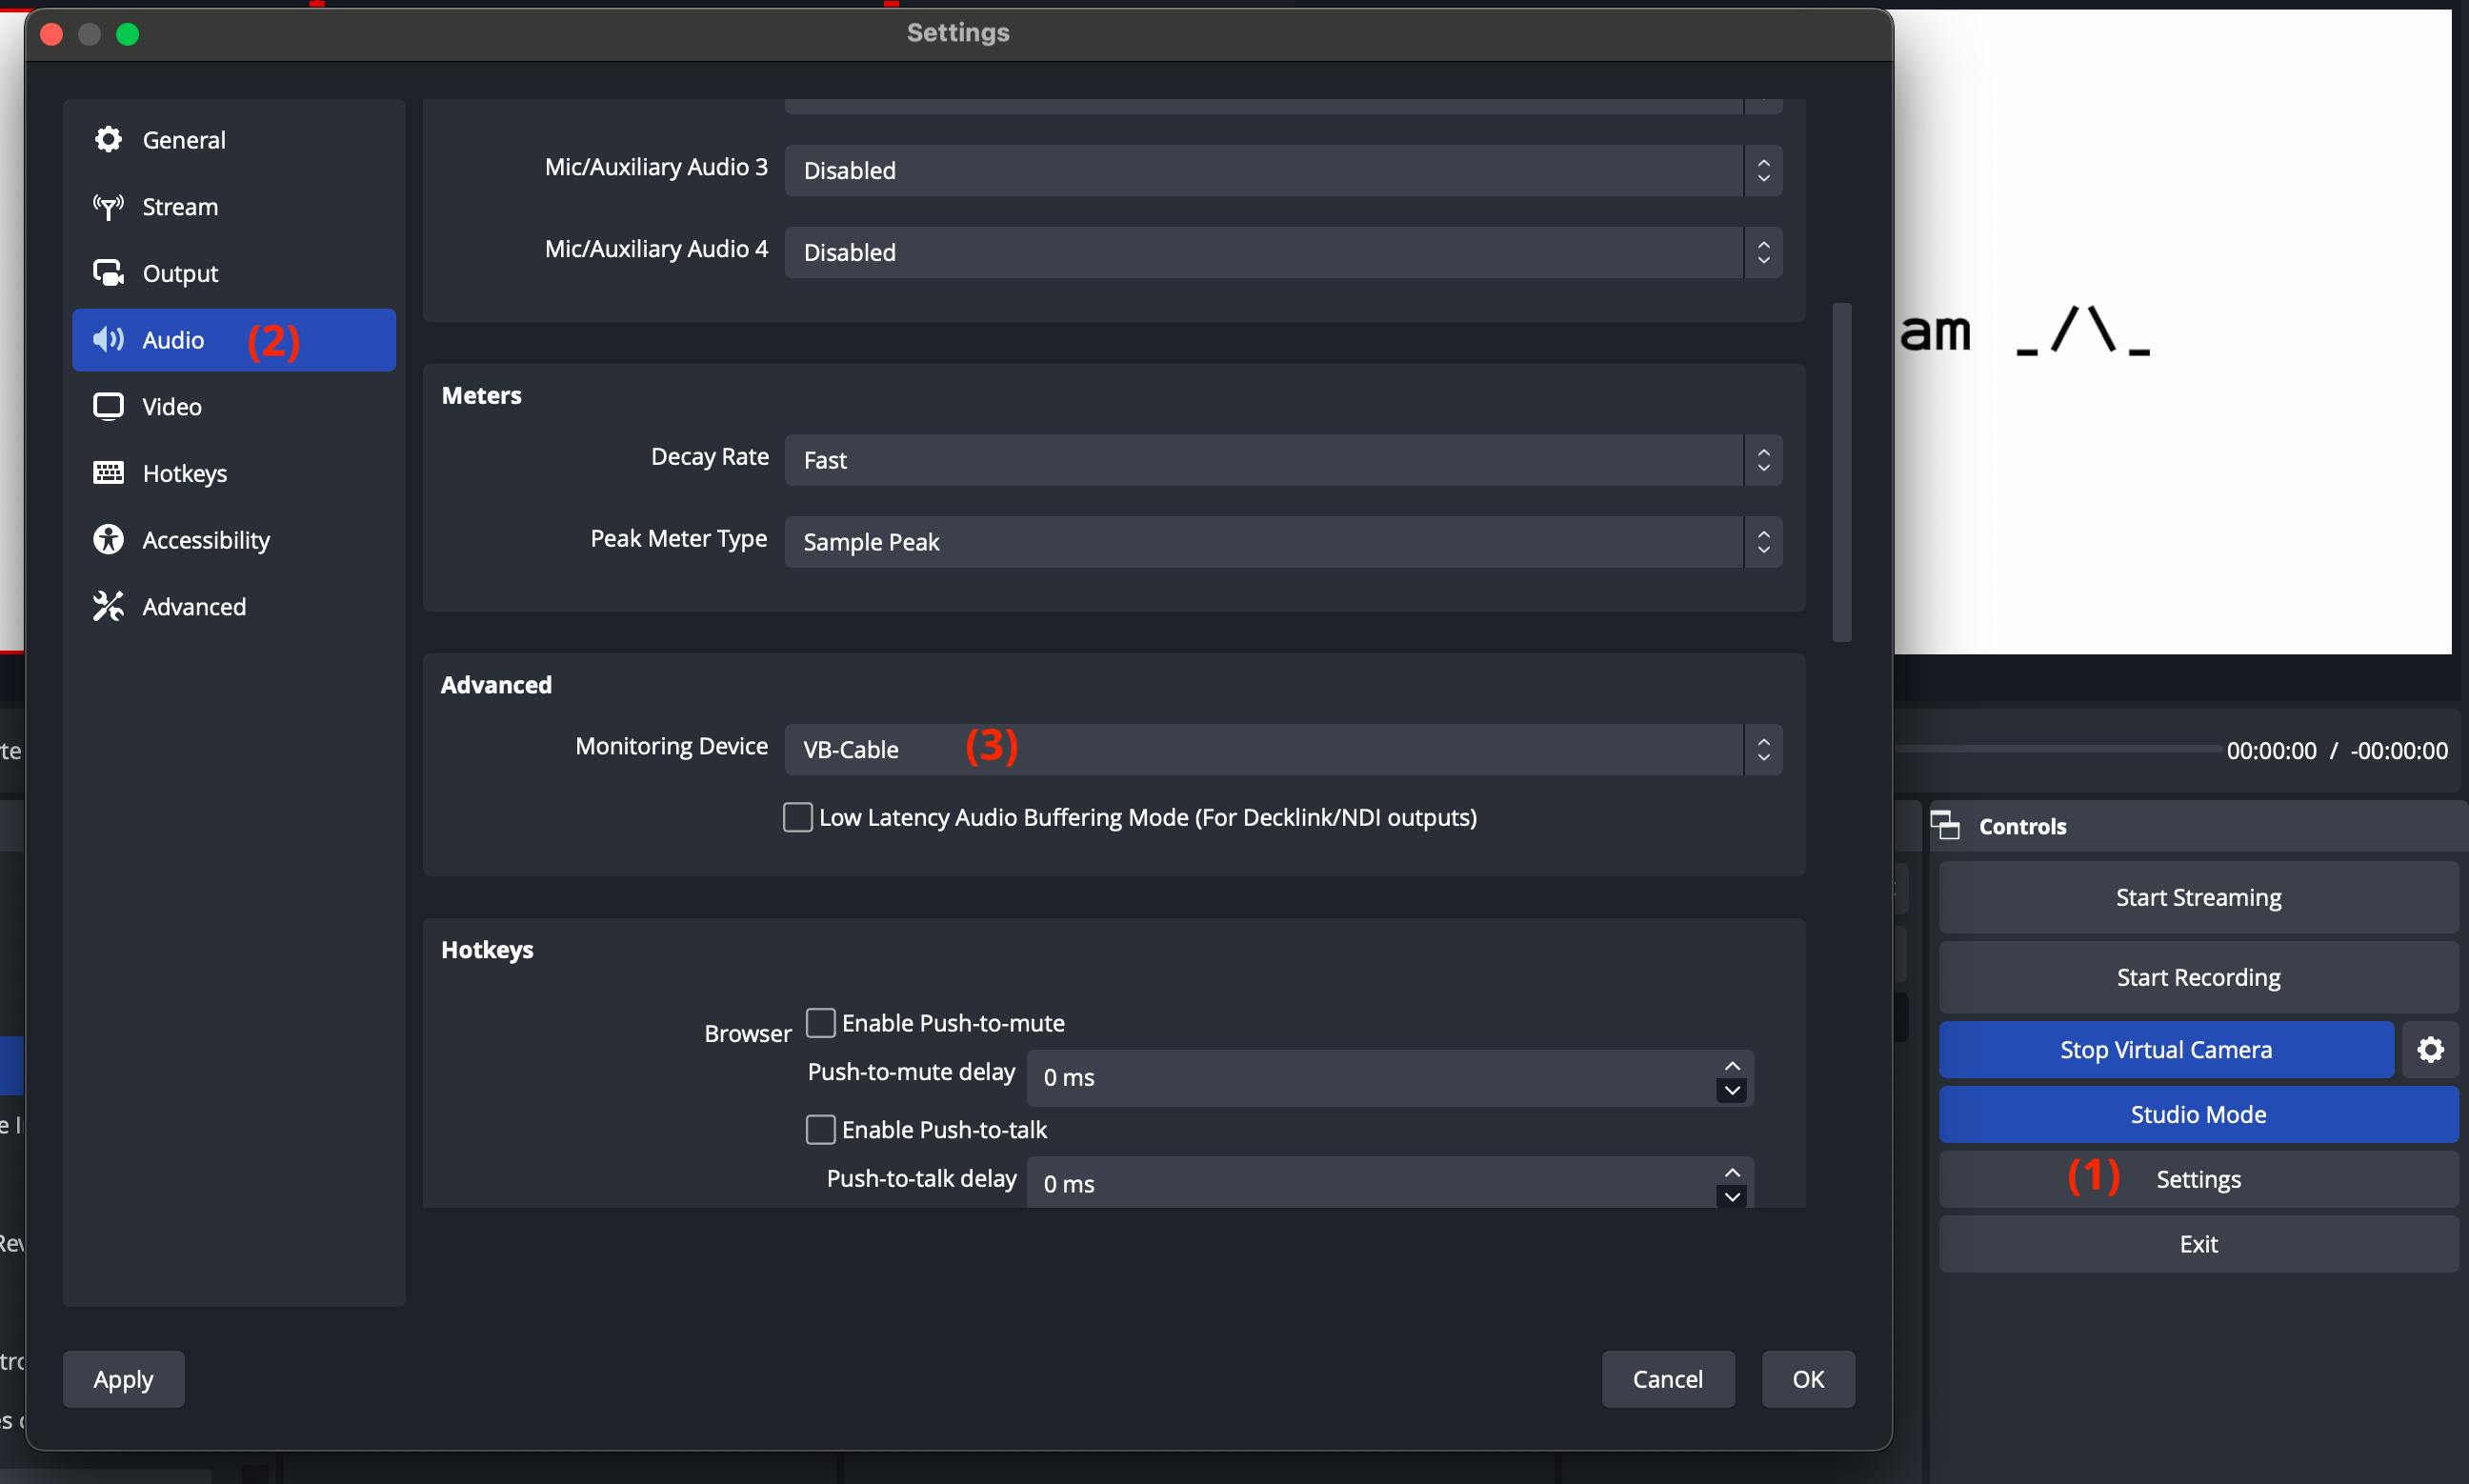
Now we will select Virtual Cable as the Monitoring Device. See the photo below:
Go to the "Settings".
Select "Audio" settings.
Go to the "Advanced" section and choose Audio Cable as the "Monitoring Device".
Click "OK" to apply changes if needed.
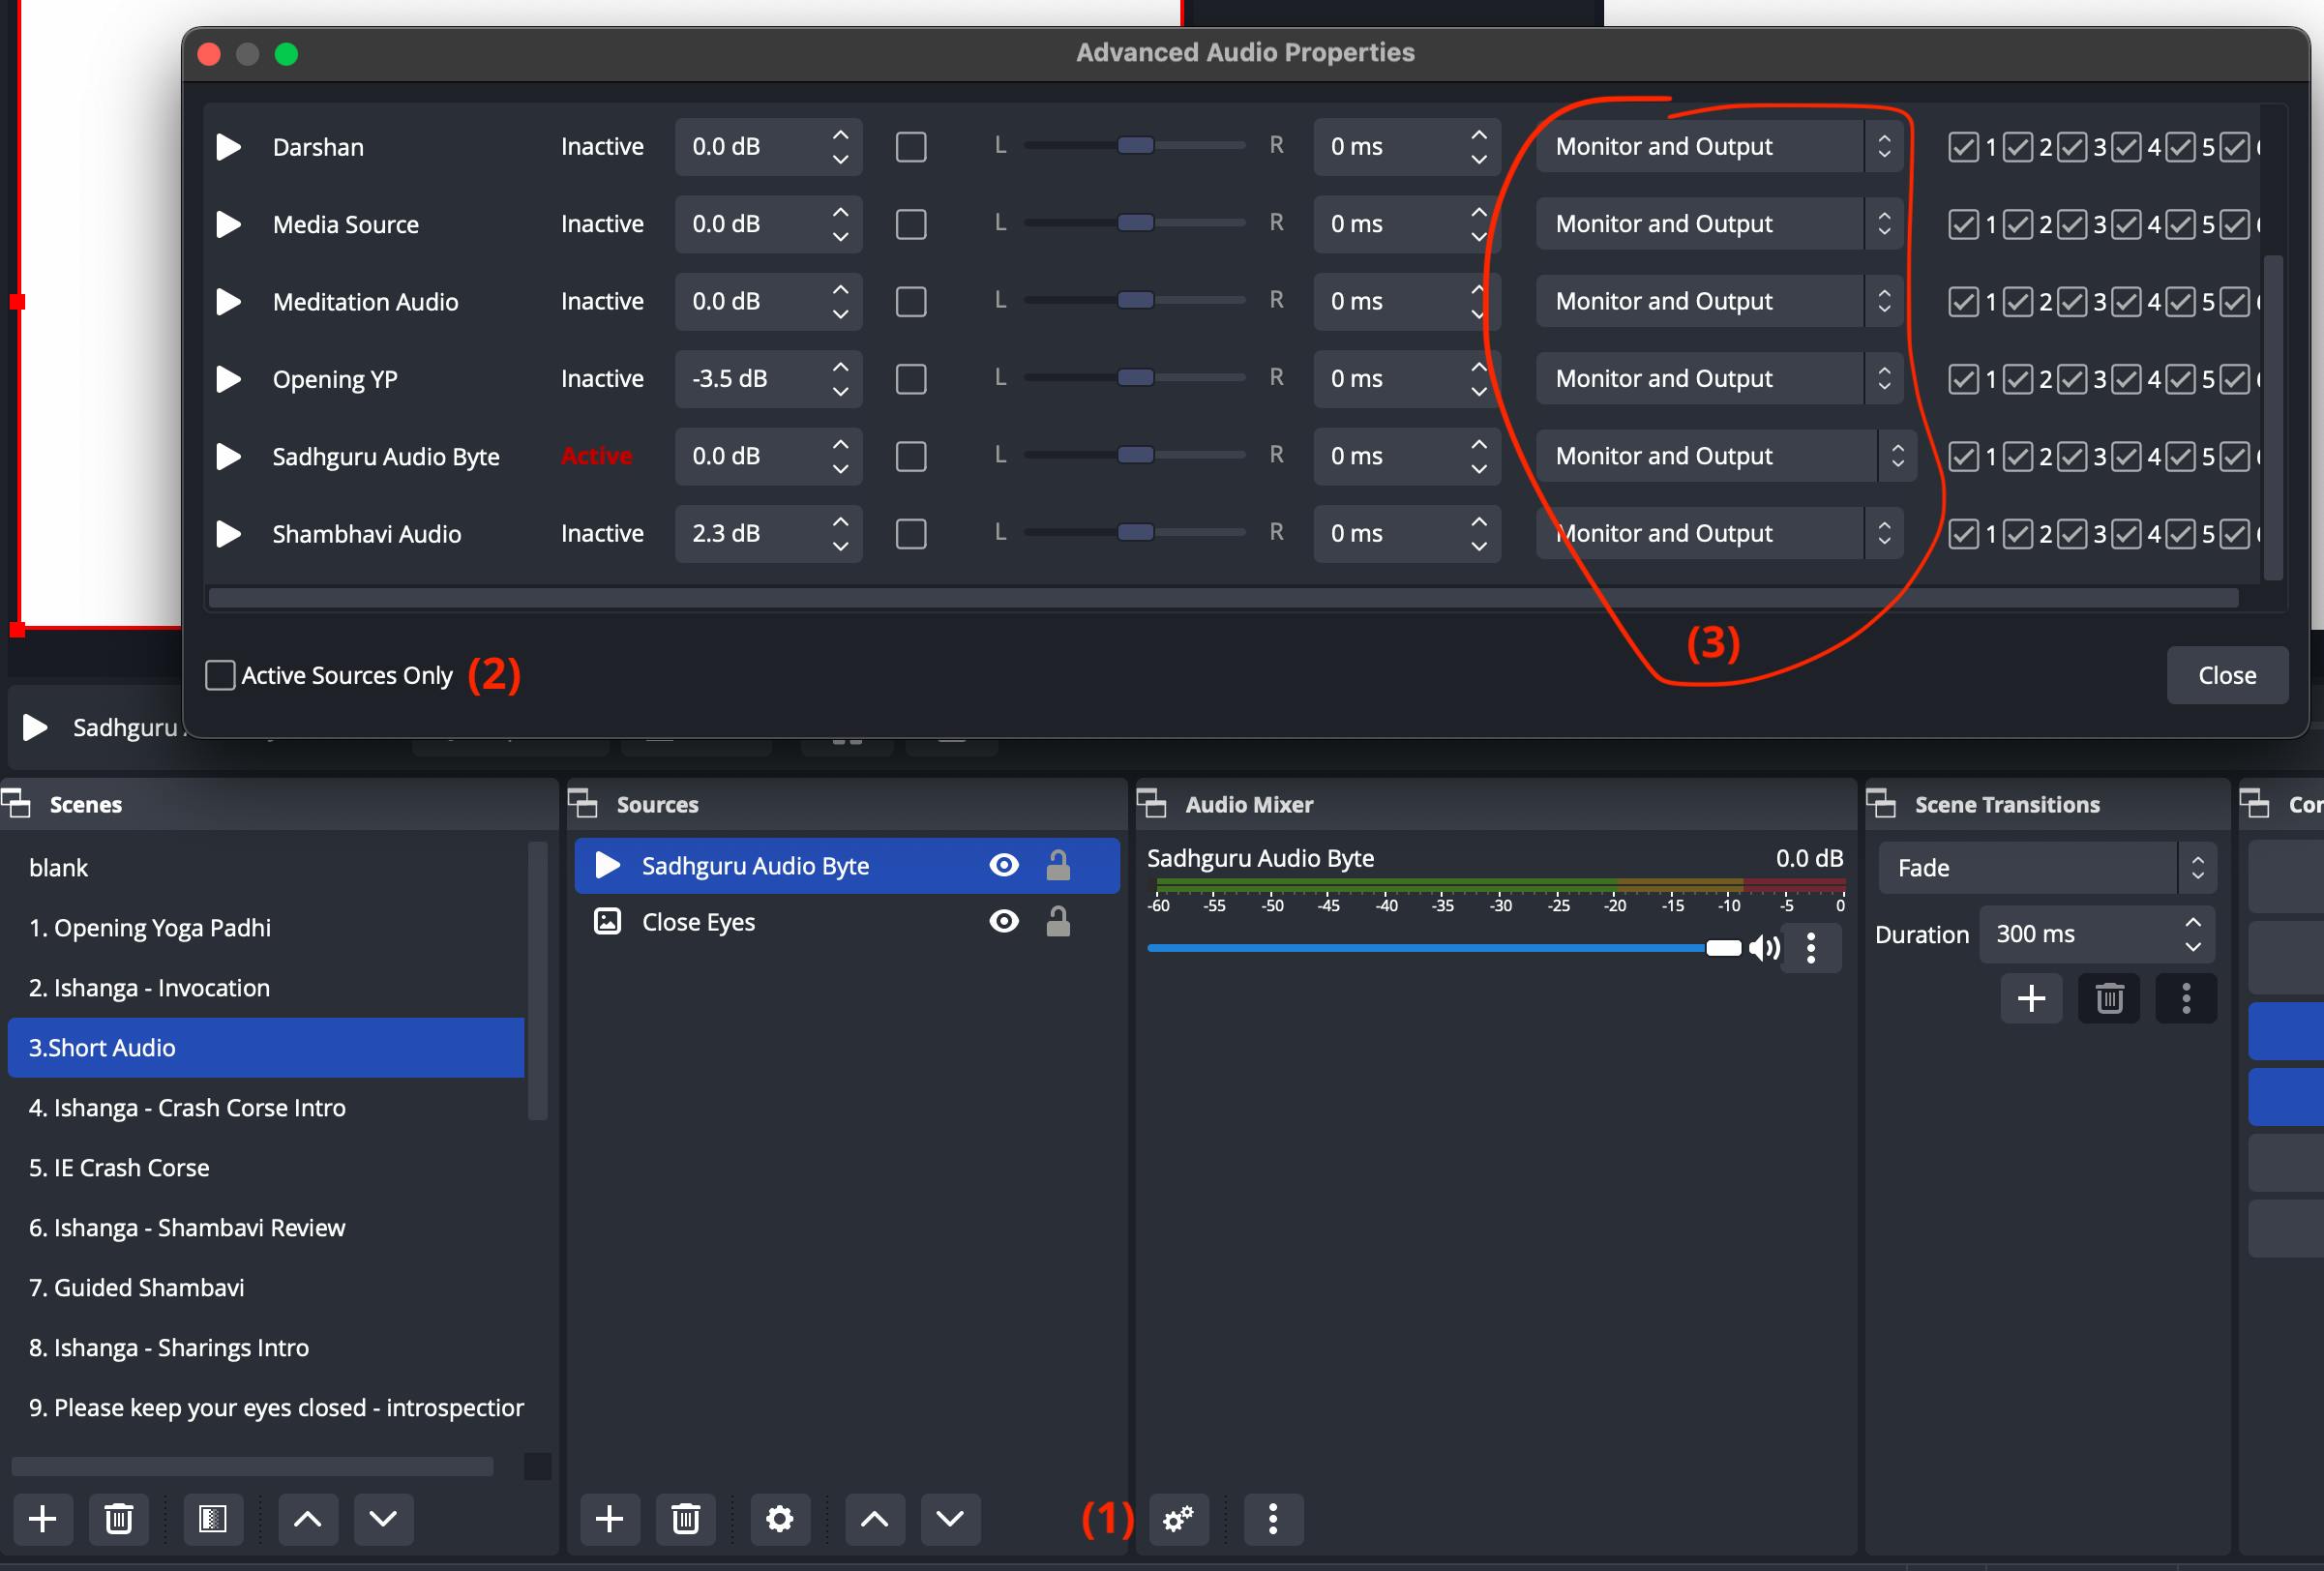
Also, each media source should have "Monitor and Output" selected in their "Advanced Audio Properties". Otherwise, OBS won't be monitoring it and this audio will not be sent to Virtual Cable input. See the photo below:
Open "Advanced Audio Properties" by clicking on the settings icon in the "Audio Mixer" view.
Uncheck "Active Sources Only" so you can check all the media sources.
Ensure all sources have "Monitor and Output" selected.
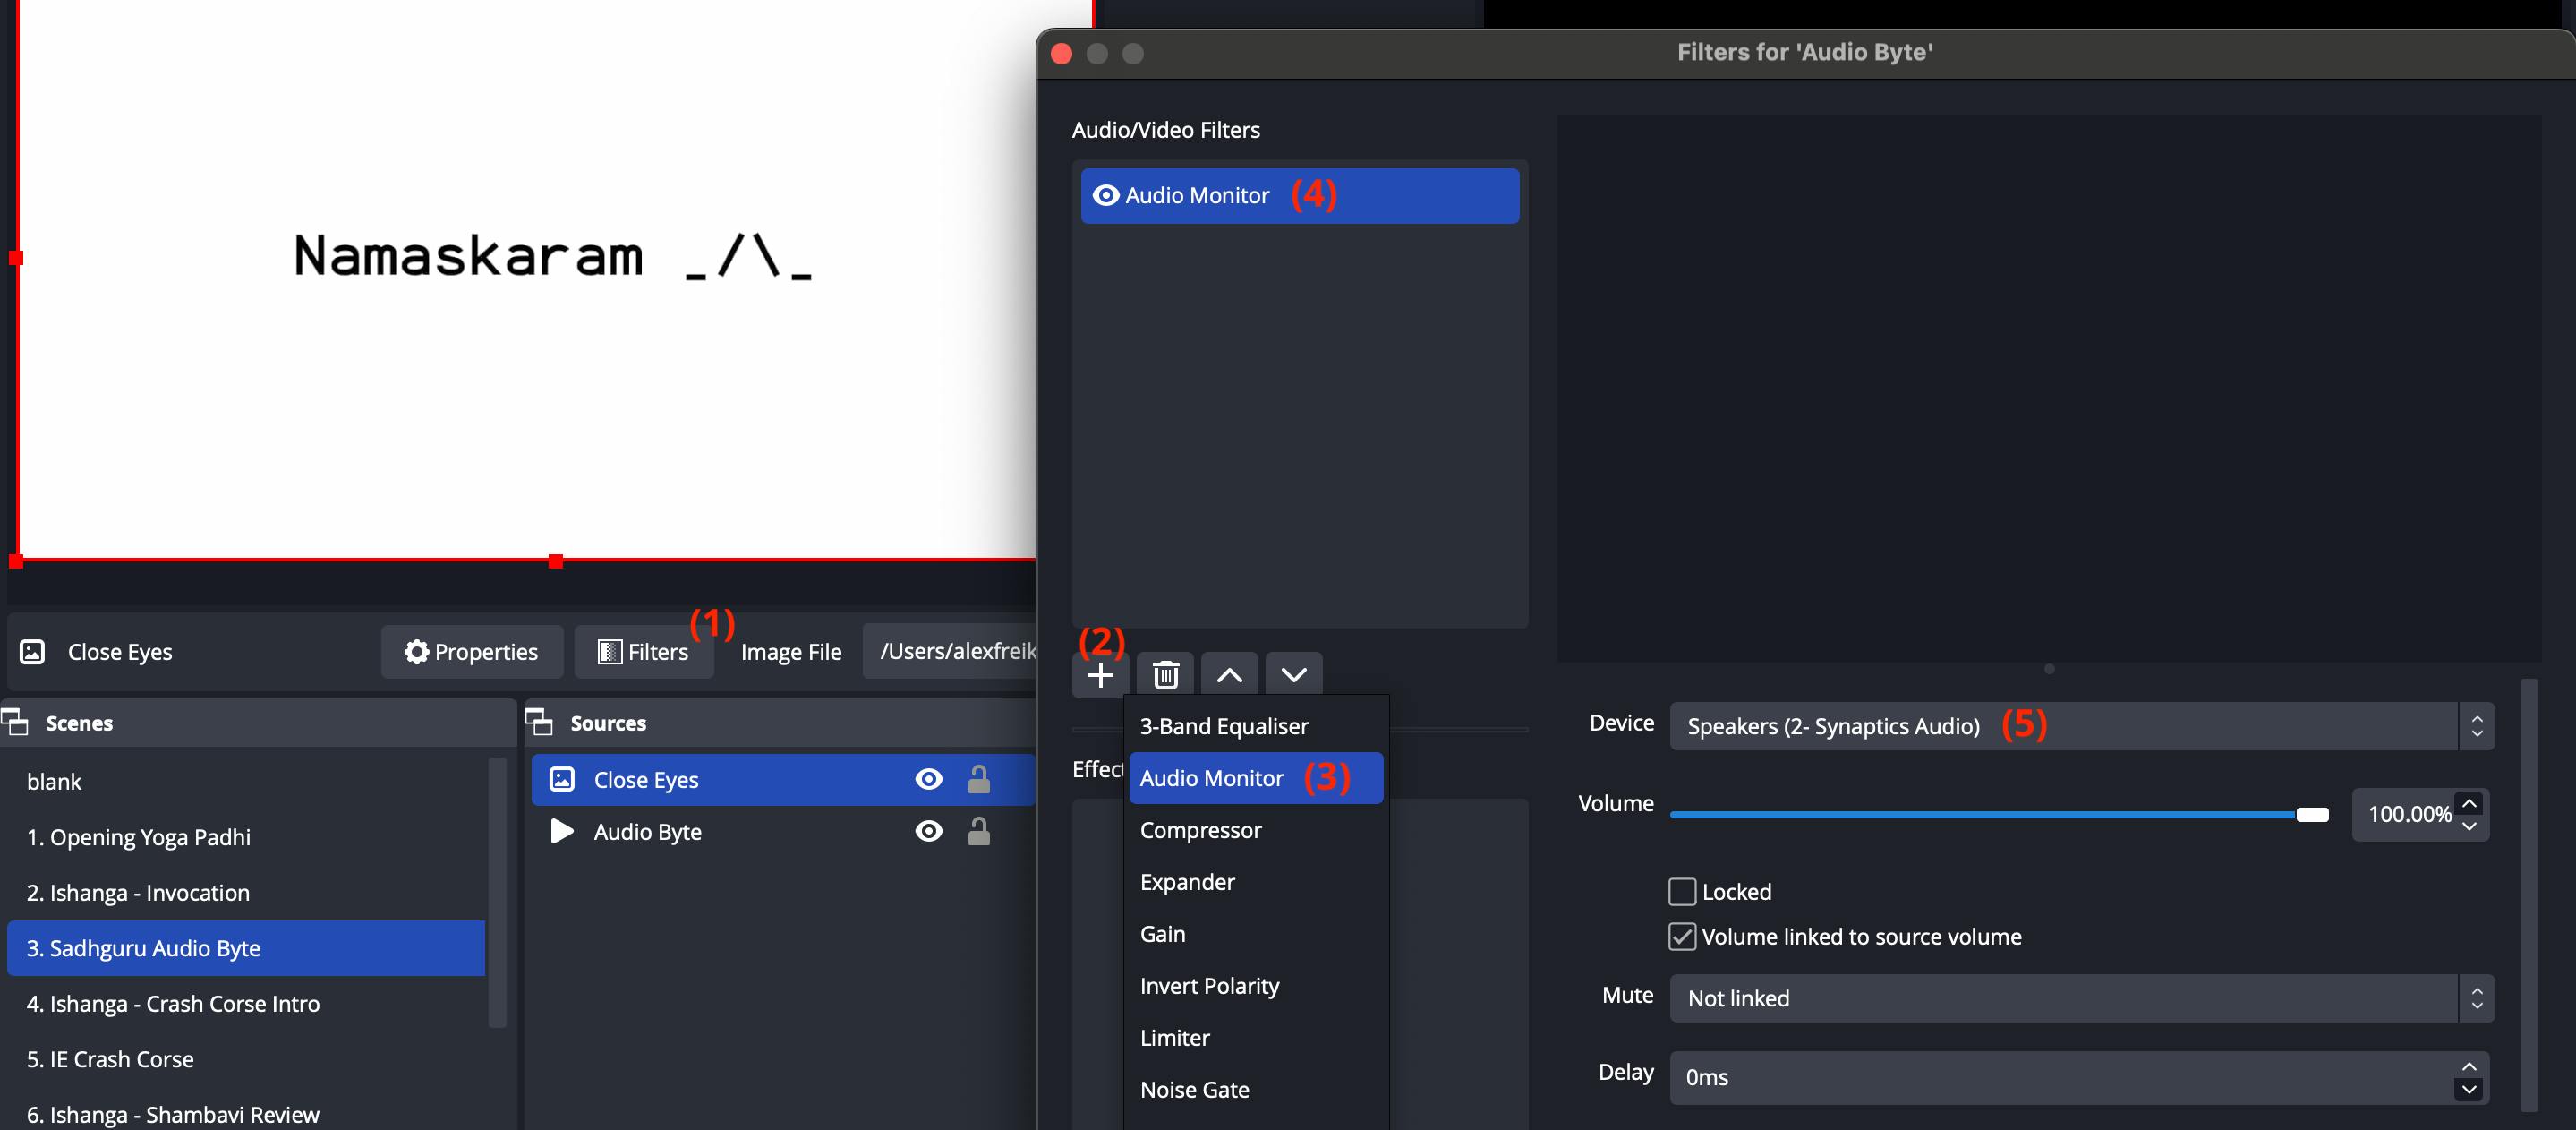
6 - Audio Monitor Filters
To hear our videos when they are playing we need to use Audio Monitor Filters. See the photo below:
You can skip steps 1-3 if the Audio Monitor filter already exists. You will just need to fix it by selecting a proper "Device". When you import the Scene all "Device" settings usually get broken.
Select a Media Source and click "Filters".
A window will pop up. Click the "+" button.
Select the "Audio Monitor" option.
Select the newly added Audio Monitor filter (you can choose any name).
Select the correct speakers as a "Device".
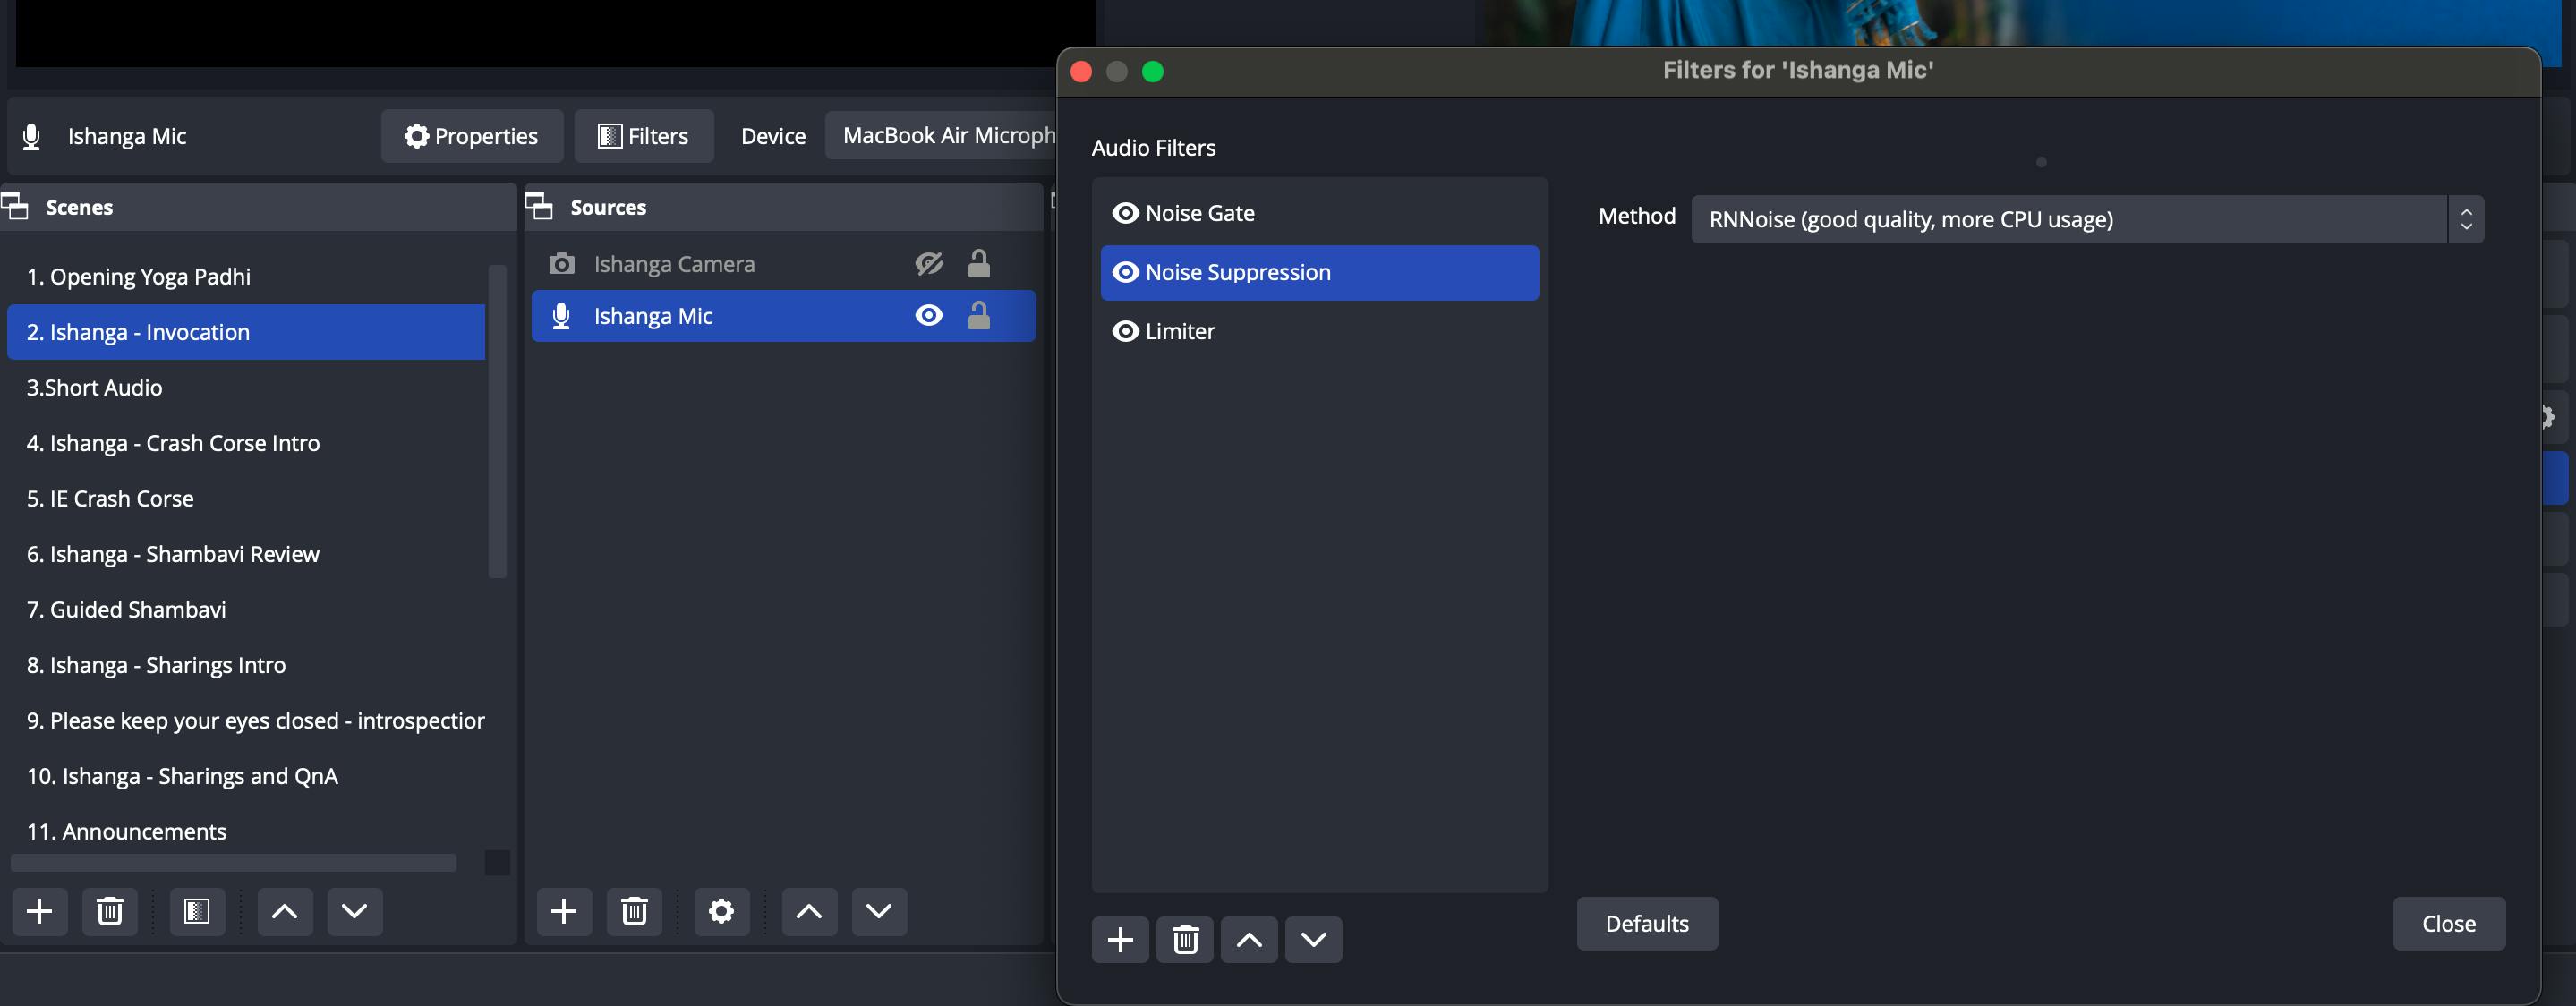
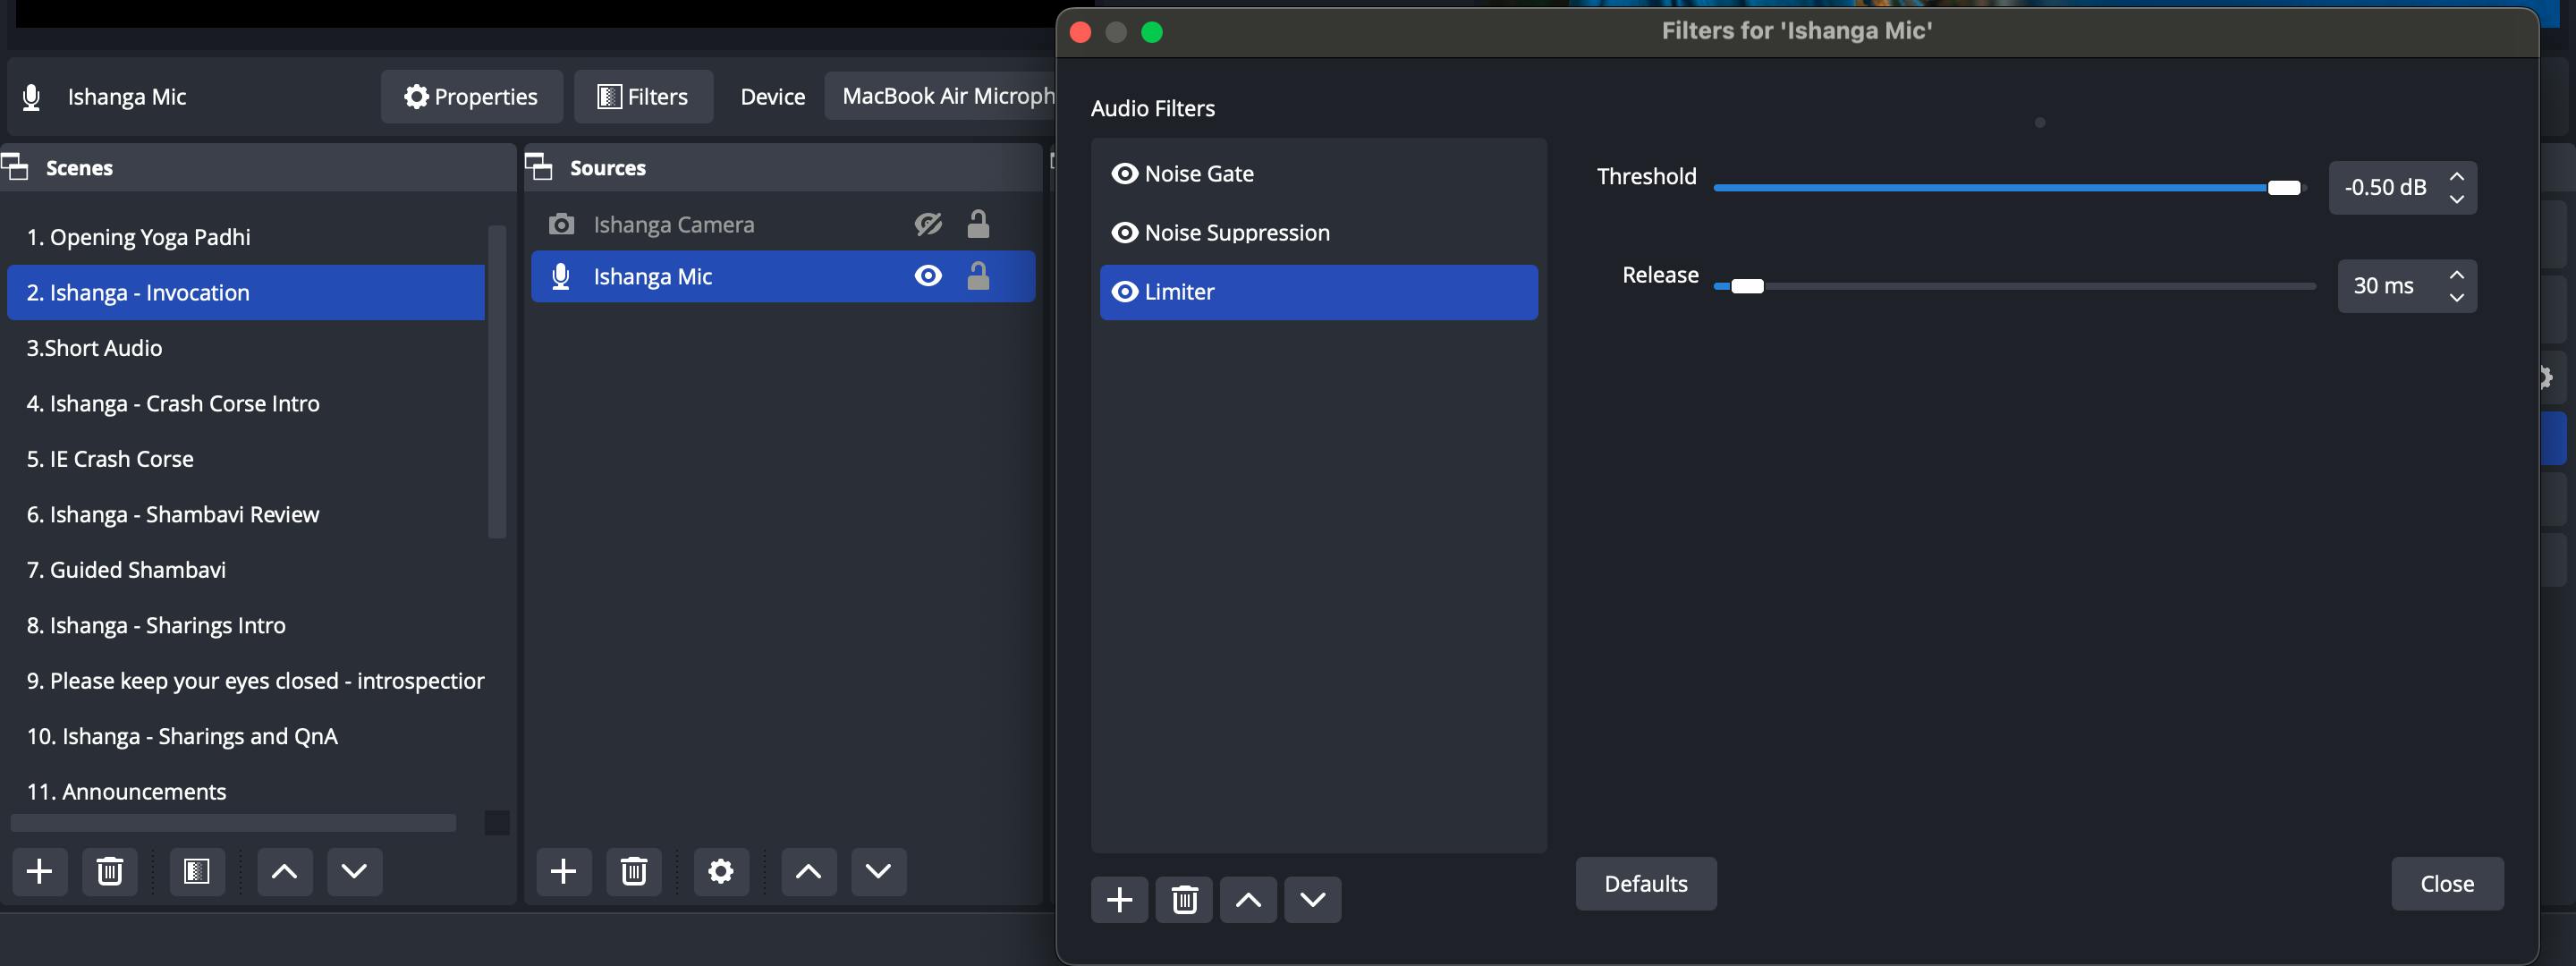
6 - Mic Filters
Optionally we can add a few more audio filters for our Mic source to improve the Mic's audio quality.
Noise Gate filter will remove all the small noises when Ishanga doesn't say anything. I use the default configurations.
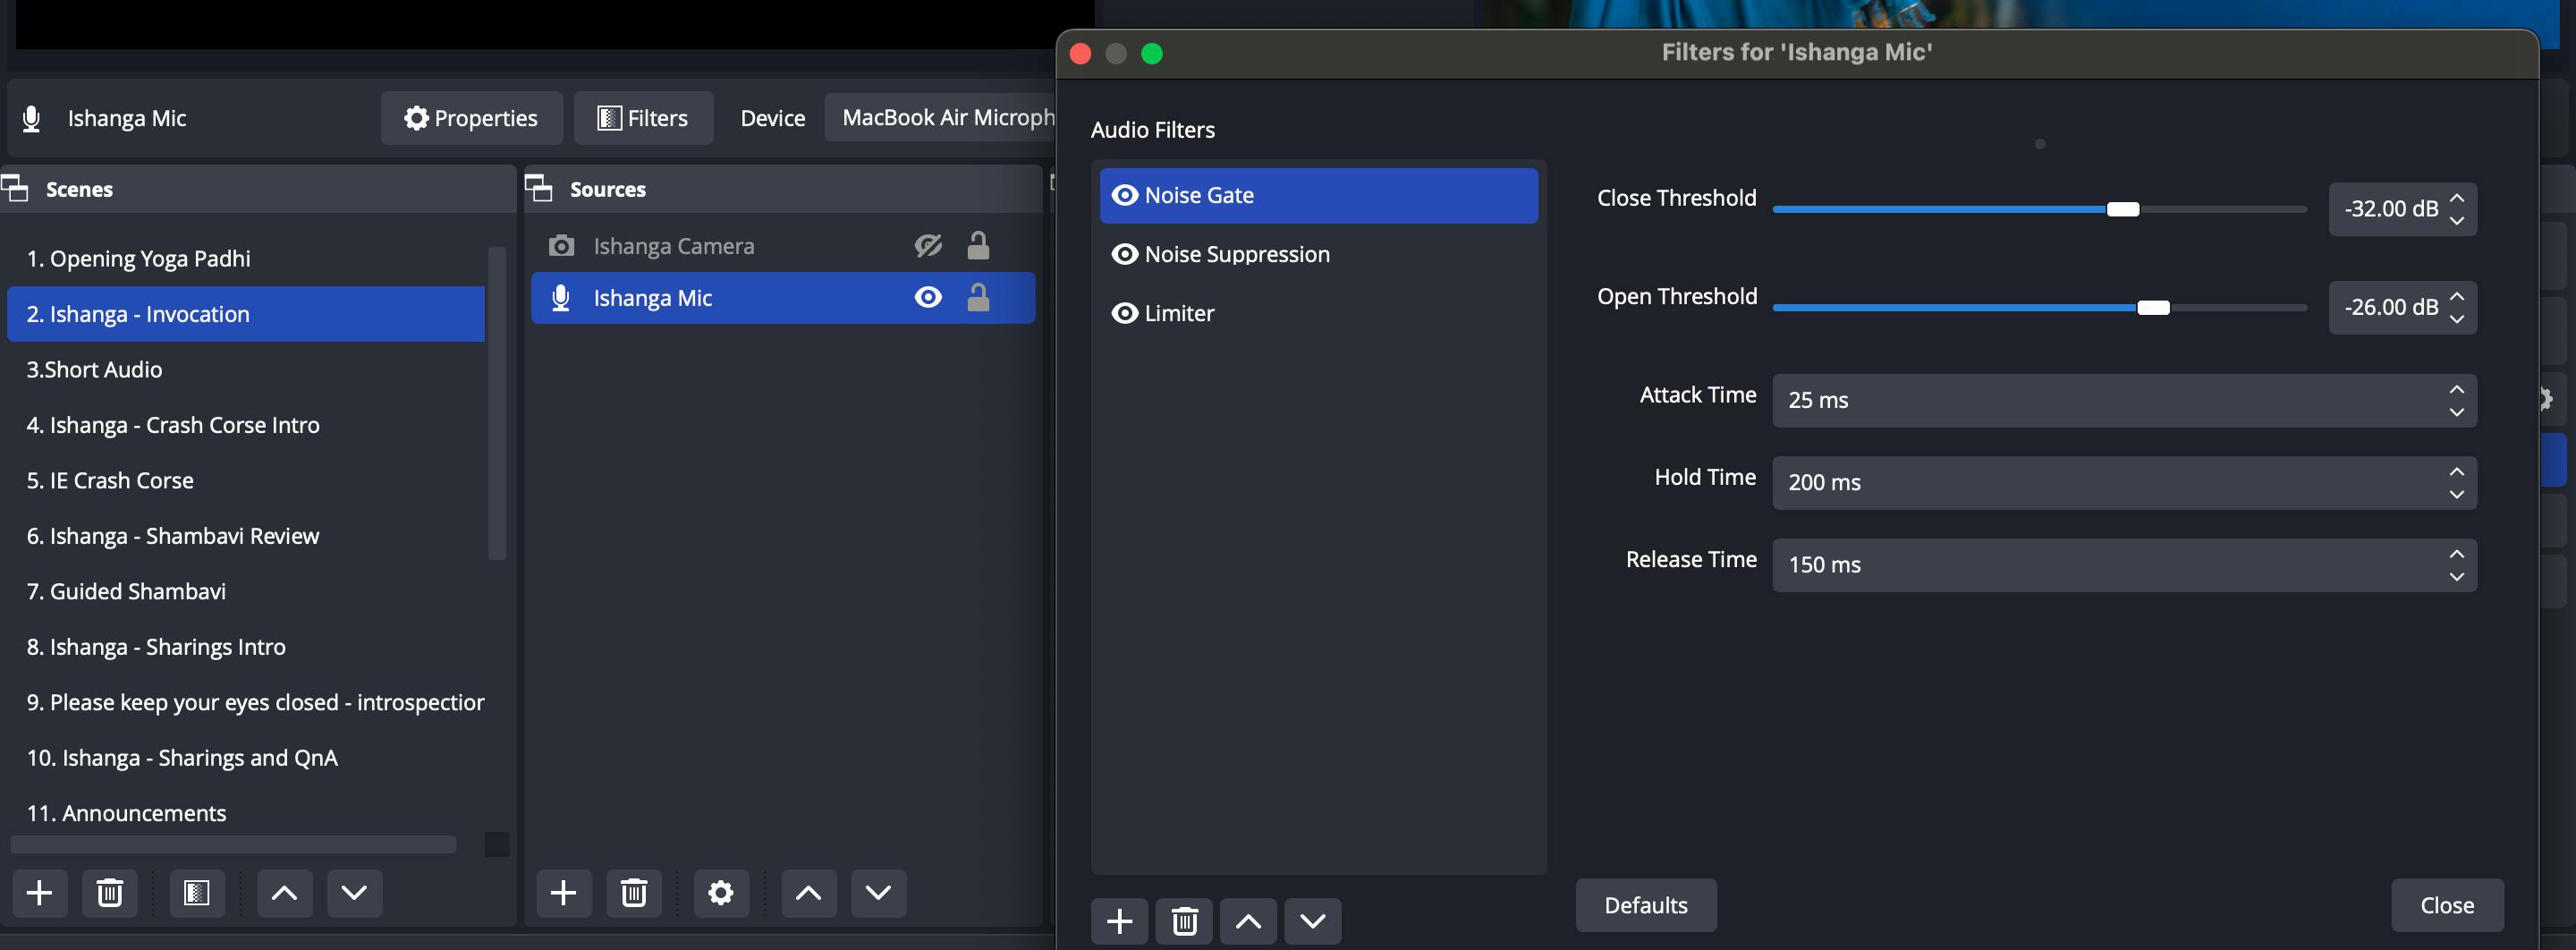
Noise Suppression will remove constant noises like a computer fan and will make our audio clear. I use the default configurations.
Limiter will prevent an audio signal from peaking above 0dB which can cause clipping and distortion. I use -0.5 dB for the "Threshold" and 30 ms for the "Release".
7- Check Everything
Please go over all the scenes and check that the video is correct and that the audio is indeed playing in Zoom for participants and in the studio for Ishanga and volunteers.
Tip: When you play audio in Zoom your mic will become green. This way you can quickly make sure that audio is indeed coming through.
Problems
Audio is not coming from OBS to Zoom
Double-check that
You selected the Virtual Cable as a Microphone in Zoom
In the OBS Audio settings, the advanced monitoring device should be Virtual Cable.
In the Advanced Audio Properties, you should select "Monitor and Output".
If it is still not coming you can try selecting "Monitor off" in "Advanced Audio Properties" and then again select "Monitor and Output", it should fix it.
If it is still not coming you can try adding a new Audio Monitor filter, and select Virtual Cable as a Device.
Camera/Mic source is not working in OBS
Click on the Properties of camera source select a different camera/mic, and then the right camera/mic once again. If it still doesn't work you can try deleting the camera/mic source in OBS and adding it again.